BDD – this acronym stand for Behavior Driven Development. This methology has been built using concepts of TDD (Test Driven Development) and DDD (Domain Driven Design).
This type of tests is often done as integration tests (UI tests or API). One of the most popular libraries is SpecFlow. I was using this solution for Xamarin, web apps and API. The easiest way to test and demo is API as web apps requires additional drivers for browsers to run automatically browser.
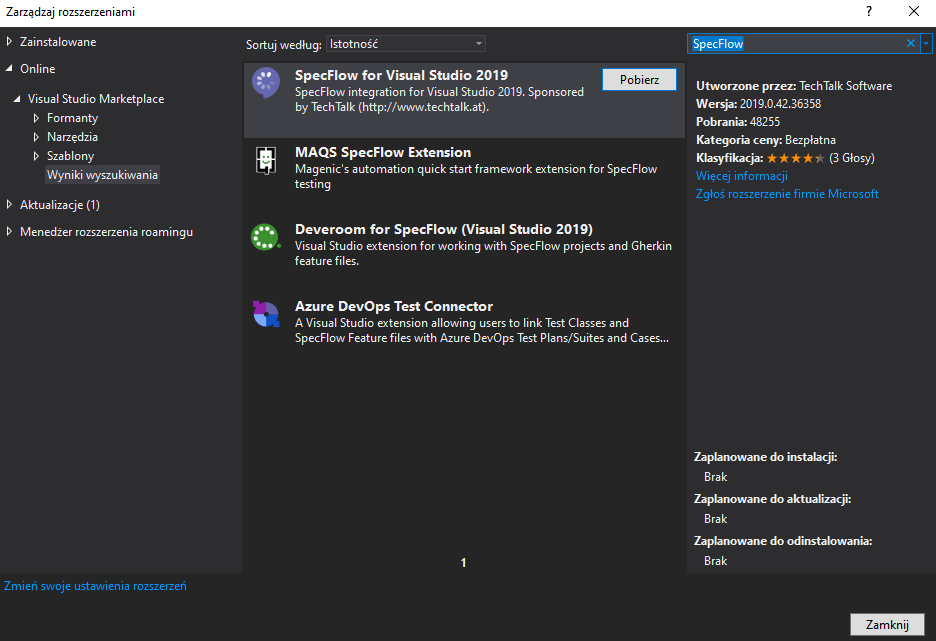
To be able to use SpecFlow, you need to install SpecFlow plugin.
Each test is representing scenario and it is composed from 3 parts:
- GIVEN – known data
- WHEN – conditions
- THEN – results
It might be multiple known data, conditions and results to validate. We can connect them with AND keyword.
As all of that is just a theory, lets take a look into code. The sample code, descirbed below, can be found on my Github: https://github.com/accent/specflow_demo.
I created a sample API in .NET Core 3.1.0. It has a single Weahter controller. Next I added unit tests project with MS Tests. It does not matter which framework you use (MS Tests, NUnit, xUnit). All of them are supported by SpecFlow (just need to install SpecFlow and appropriate plugin). I’ve decided to use MS Tests as I have this framework in my current project.
Also you need a package SpecFlow.Tools.MsBuild.Generation to generate tests properly. For MS Tests you don’t need an additional test runner, Visual Studio detects tests on build.
The controller which we will be testing is named WeatherForecast has 1 action – GET.
[ApiController]
[Route("[controller]")]
public class WeatherForecastController : ControllerBase
{
     private static readonly string[] Summaries = new[]{
             "Freezing", "Bracing", "Chilly", "Cool", "Mild", "Warm", "Balmy", "Hot", "Sweltering", "Scorching"};

     private readonly ILogger _logger;

     public WeatherForecastController(ILogger logger)
     {
          _logger = logger;
     }

     [HttpGet]
     public IEnumerable Get()
     {
          var rng = new Random();
          return Enumerable.Range(1, 5).Select(index => new WeatherForecast{
              Date = DateTime.Now.AddDays(index),
              TemperatureC = rng.Next(-20, 55),
              Summary = Summaries[rng.Next(Summaries.Length)]}).ToArray();
     }
}
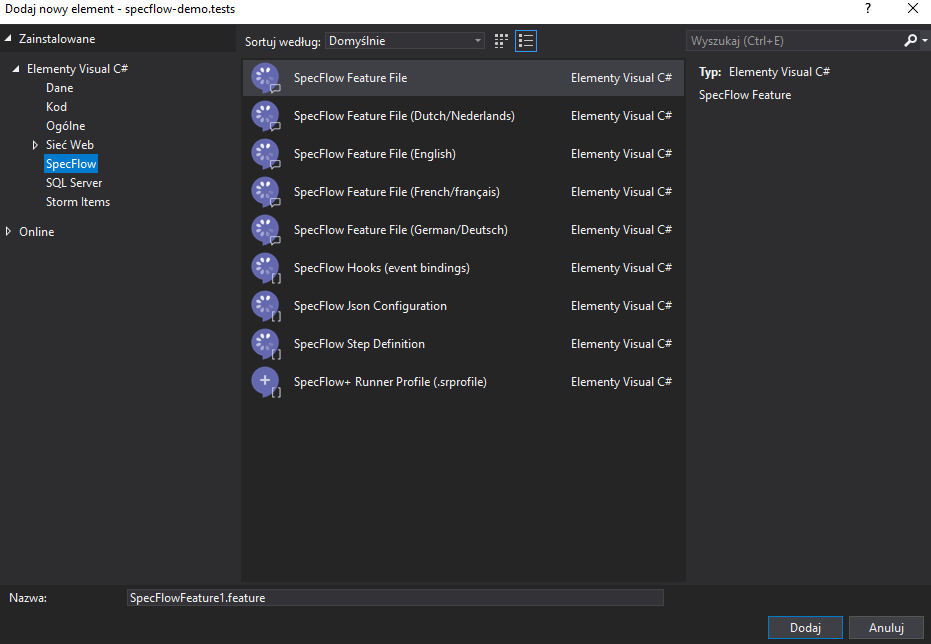
After adding tests project, we can start with creating tests. As a first step we need to select add new element. We will have additional section – SpecFlow. We will start with new feature file which describes our test scenarios.
Please keep in mind to name properly the test. I choose WeatherForecast name. The sample test was generated (with sample steps).
As you can see it does not match to our case. The first part is description of the feature which will be tested. Scenario has unique name and then the steps to execute which we have to implement. So after accomodating the code to the needs we get the following code.
Feature: Weather
     In order to prepare the right things for a trip
     As a traveller
     I want to check the weather for next five days

Scenario: Valid weather forcast for next 5 days
     Given Weather forecast url
     When I request the forecast
     Then the result should be the weather forecast for next five days
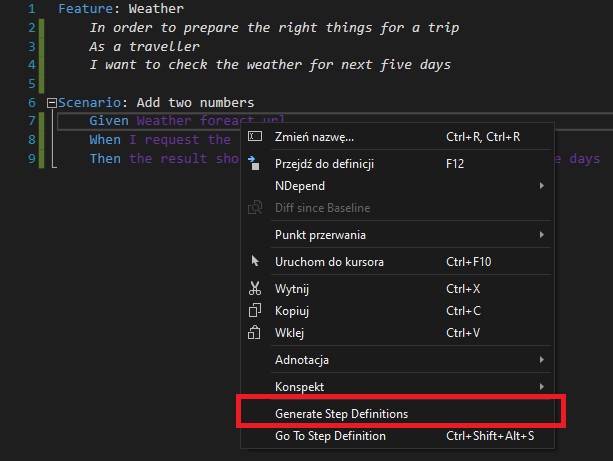
As first step, add new SpecFlow step definitions file. Then to generate the code press F12 or select an option Generate Step Definitions.
As usualy in the project there is multiple step definition files, I copy steps and put them into right files (to keep pieces reusable and separated by logic).
That how looks steps after generation
    [Given(@"Weather foreact url")]
    public void GivenWeatherForecastUrl()
    {
        ScenarioContext.Current.Pending();
    }

    [When(@"I request the forecast")]
    public void WhenIRequestTheForecast()
    {
        ScenarioContext.Current.Pending();
    }

    [Then(@"the result should be the weather forecast for next five days")]
    public void ThenTheResultShouldBeTheWeatherForecastForNextFiveDays()
    {
        ScenarioContext.Current.Pending();
    }
Considering first method (GivenWeatherForecastUrl) it would be nice to pass URL as parameter instead of hardcoding it (we may run tests on different environments). First step is adding parameters to the method, and second one is to add (.*) to Given attribute (to make it visible in test).
[Given(@"Weather forecast (.*)")]
public void GivenWeatherForecastUrl(string baseUrl)
{
	ScenarioContext.Current.Pending();
}
On the screenshot it is visible that url became a parameter.

So now we can add Examples section which will replace parameters with test values. I made the same change to replace number of days by digit (five to 5). This section is used to specify test cases.
Examples:
	| baseUrl                 | requestUrl      | days |
	| http://localhost:52422/ | weatherforecast | 5    |
For this test, I used HttpClient, however for real usage, I recommend to use RestSharp or Refit.
[Given(@"Weather forecast (.*)")]
public void GivenWeatherForecastUrl(string baseUrl)
{
	this.baseUrl = baseUrl;
}

[When(@"I request the forecast (.*)")]
public async Task WhenIRequestTheForecast(string requestUrl)
{
	var httpClient = new HttpClient();
	httpClient.BaseAddress = new Uri(this.baseUrl);
	this.context.Add("response", await httpClient.GetAsync(requestUrl));
}

[Then(@"the result should be the weather forecast for next (.*) days")]
public async Task ThenTheResultShouldBeTheWeatherForecastForNextFiveDays(int days)
{
	var response = this.context["response"] as HttpResponseMessage;
	Assert.AreEqual(HttpStatusCode.OK, response.StatusCode);
	var responseContent = await response.Content.ReadAsStringAsync();
	var receivedDays = JsonConvert.DeserializeObject<List<WeatherForecastModel>>(responseContent).Count;
	Assert.AreEqual(days, receivedDays);
}

private class WeatherForecastModel
{
	public DateTime Date { get; set; }

	public int TemperatureC { get; set; }

	public int TemperatureF { get; set; }

	public string Summary { get; set; }
}
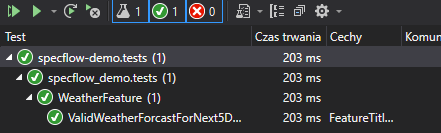
As you can see on the given example, async/await is supported and tests are passing successfully. Also you may note that I am using ScenarioContext to pass data between steps.
We get a fully working simple test of API. This article is just an intro to the topic. I encourage you for deeper exploration of this topic on your own.
Nice! Waiting for more complex scenario, ie reusing blocks.
Thanks Lukasz, I will provide something soon.